

 Spring cleaning means getting into places that may not have been cleaned in a while or were entirely forgotten to be cleaned. Needless to say, spring cleaning is usually a project that is not completed in one day or over one weekend. Think about every area of your home as an individual spring-cleaning project. This way, you will easily develop a plan and will not feel overwhelmed by the sheer magnitude of the work ahead. To help you plan, here are the general areas for spring cleaning:
- Cleaning the kitchen: clean the small appliances, countertops, cabinets, pantry, floors, microwaves, and refrigerator; dust refrigerator coils, defrost the freezer, clean out the pantry and deep clean oven.
- Cleaning the bathroom: scrub the tub, shower, toilet, sink, and mirrors and clean the shower curtains; dispose of expired cosmetics and beauty products, wash towels and linens, update the first-aid kit, and clean grout.
- Cleaning the bedroom: wash the bedding, dust the furniture, vacuum the carpets, and clean the windows, closet, drawer, and under the bed.
- Cleaning the living room: dust the furniture, vacuum the carpets, clean windows, and wipe down baseboards.
- Cleaning the home office: organize files and stationeries and clean computers.
 Decluttering is the essential first step. Why clean around piles of stuff you don’t even need? Think of it as laying the foundation for a successful clean. Here’s a simple method:
- The Four-Box System: Grab four boxes and label them: “Trash”, “Donate”, “Keep”, “Relocate”.
- One Area at a Time: Don’t try to declutter your entire house at once. Start with one area (a drawer, a shelf, a corner of a room) or one category of items (clothes, books, kitchen gadgets).
- Ask the Tough Questions: For each item, ask yourself: Have I used it in the past year? Do I love it? Does it serve a purpose? If the answer is no to all three, it’s probably time to let it go.
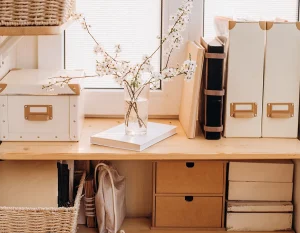
 Declutter & Organize: Just like with other areas of your home, begin by decluttering and organizing. Identify all areas and surfaces that have accumulated items, large or small, and go through them one area at a time.
- Clean Top to Bottom: Begin by dusting and cleaning ceiling fans, light fixtures, crown molding, and curtain rods. This prevents dust from falling onto already cleaned surfaces. Work your way down to the windows, furniture, carpets, floors and baseboard.
- Clean Windows: Wash windows inside and out for a sparkling view. Use a squeegee for streak-free results, drying the blade after each swipe. Clean screens with soap and water.
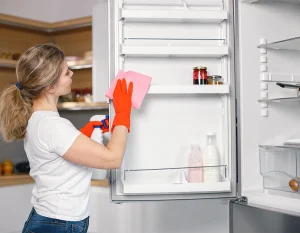 Appliances: Deep clean the microwave, oven (baking soda paste works wonders!), and refrigerator (don’t forget to clean the coils!).
- Countertops & Cabinets: Wipe down all surfaces with a suitable cleaner for your countertop material. Pay attention to greasy splatters.
- Pantry Purge: Discard expired items and organize the rest.
- Floors: Sweep and mop with a cleaner appropriate for your floor type.
- Over & Under: Some of the most forgotten places to clean are at the top, under, and behind the appliances. Be sure to give those places a good dust and scrub!
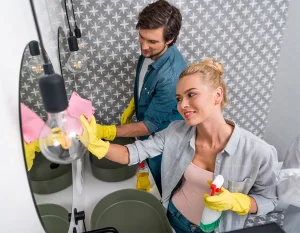 Scrub-a-Tub: Tackle the tub, shower, toilet, and sink. Use a grout brush for stubborn grime. Check out some tips and tricks for faster, easier, and less costly cleaning products such as vinegar and baking soda.
- Mirrors & Shower Doors: Squeegee shower doors after each use to prevent soap scum buildup.
- Bathroom Cabinets & Closets: This is your chance to purge and organize! Clean out the cabinets, discard expired cosmetics and toiletries, and get rid of things that may not belong in the bathroom.
- Floors: Sweep and mop floors and clean the baseboards. Do not forget to get under the tub!
 Purge & Organize Closet: This is easily the most time-consuming project, so get it out of the way first.
 - Organize Dressers & Nightstands: These bedroom furniture items tend to get cluttered over time. Go through the contents of your dressers and nightstands to get rid of the clutter and restore order.
- Dust & Vacuum: Give a thorough dusting to the top of the furniture, curtain rods, and the bed frame. Vacuum under the bed and under the furniture.
- Clean the Bedding: Wash bedding, duvet covers, bed skirts, clean pillows and mattresses.
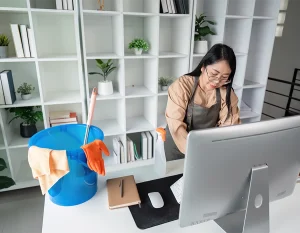 Sort Through the Paperwork: Thoroughly go through any papers, notes, bills, and documents that have accumulated in your home office. Discard the unwanted and file the rest.
- Clean the Desk: writing supplied, stationery, and other items off your desk and give it good dusting. Do not forget to clean your computer!
- Clean Up the File System: If you are using a file cabinets to store work or household paperwork, this would be a great time to go through those files and get them up to date.
 Spring cleaning can be stressful and seem like a daunting task, especially if you don’t like cleaning (that’s OK! Many people don’t). However, planning out the project and breaking it down into small sections can make it manageable and – you’ll be surprised – enjoyable.
- Break It Down: Don’t try to do everything in one day. Divide tasks into smaller, manageable chunks.
- Create a Schedule: Plan your cleaning schedule in advance to stay on track. To help plan and to add a sense of accomplishment, make a spring cleaning checklist.
- Celebrate Small Wins: Acknowledge your progress and reward yourself for completing tasks. If all you can do in one day is clean out a drawer, that is perfectly OK. Just remember to tick it off the checklist because that’s progress too!
- Music Makes the World Go Round: Put on some upbeat music or listen to a podcast to make the time fly by.
- Ask for Help: Don’t be afraid to enlist the help of family members.
 Having the right tools makes all the difference. Here’s what you’ll need:
- Microfiber cloths (lots!)
- Sponges and scrub brushes
- Vacuum cleaner
- Broom and dustpan
- Mop and bucket
- All-purpose cleaner
- Window cleaner
- Natural cleaning solutions (baking soda, vinegar, lemon juice)
- Gloves
- Trash bags
- Storage containers (for organizing)